

Ahhhhhh..........
That my friends, is a deep, satisfying sigh you're hearing through your computer screen.
That's because today I'm checking off one of the time-consuming projects I've been working on this summer and I'm pretty happy with the end result.
My newly made mantel finally brings an end to the fireplace transformation in this house.
These pictures give you an glimpse of the 20 month process, showing you the original wall (top left), the red brick we uncovered beneath the drywall and added to, and the subsequent paint and design of the entire fifteen foot wall.
If you're new to this blog and you want to see Part One of this DIY mantel with some how-we-did-it pictures, you'll want to click HERE
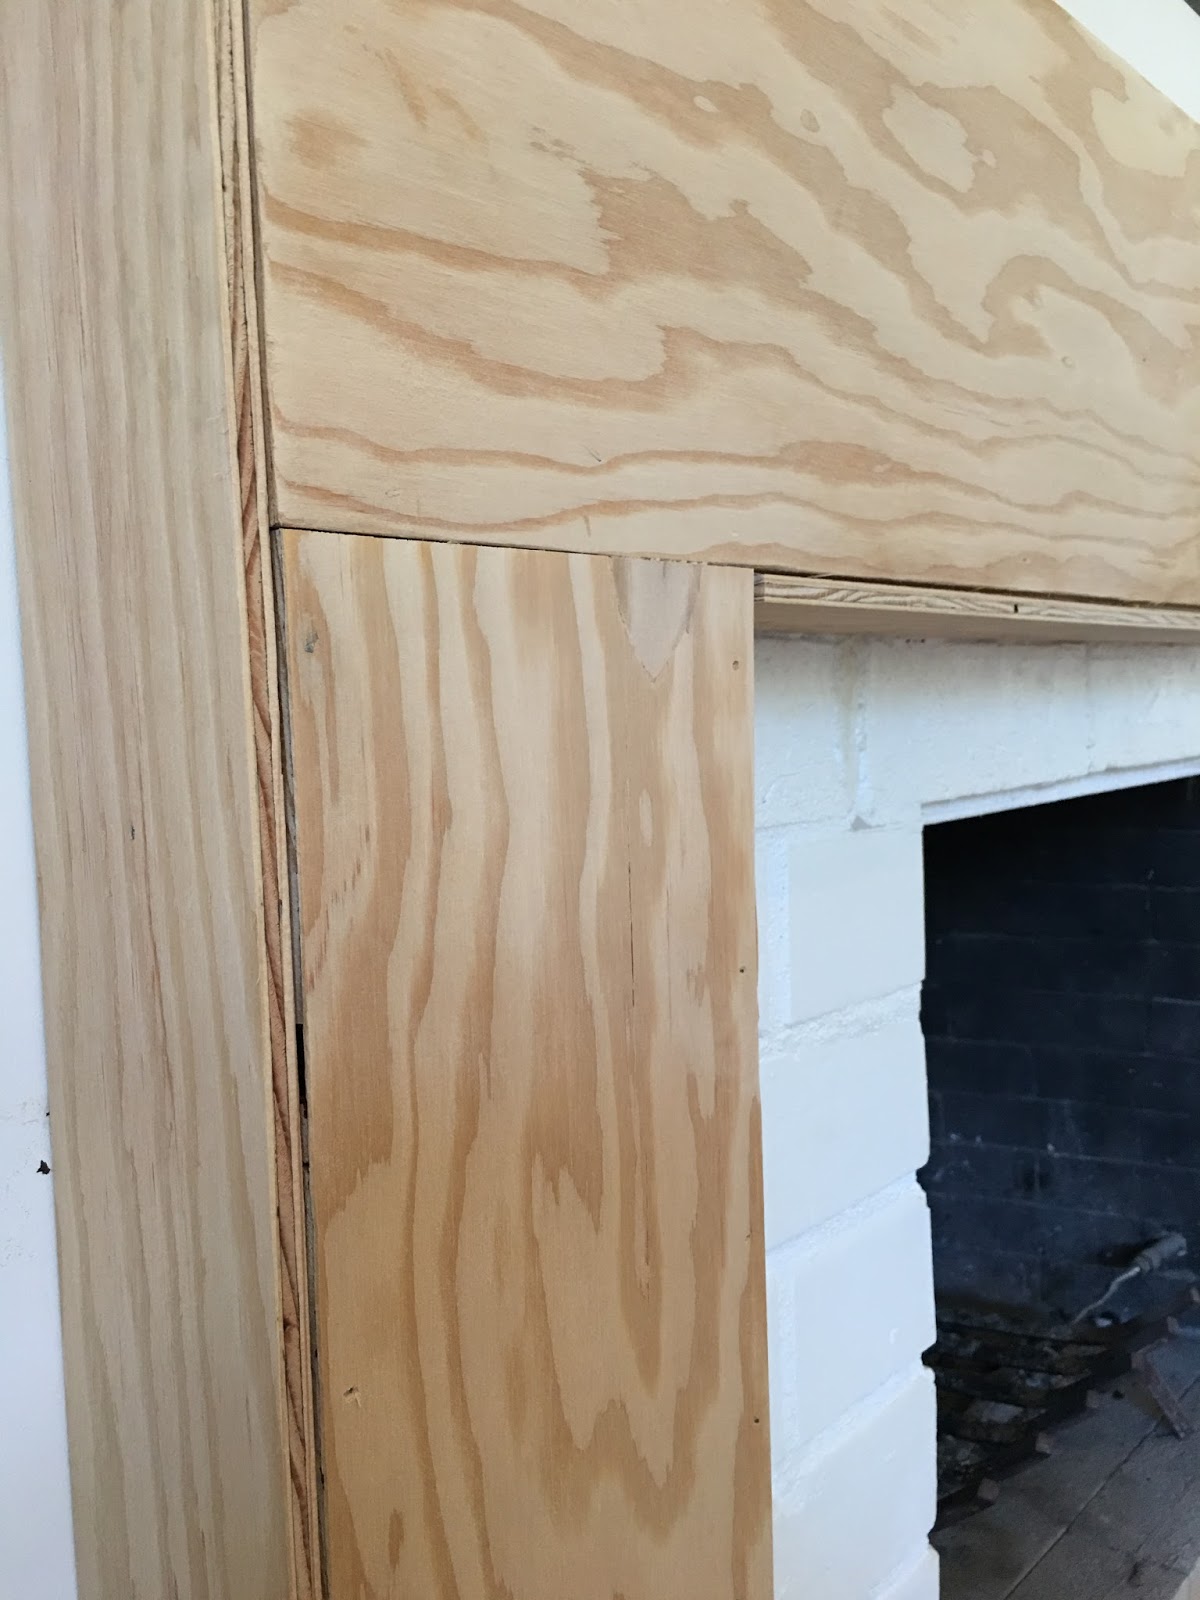
Here's a picture after the plywood "boxes" were added (part 1)
If you remember the last post ended with:
- the three plywood boxes built as the mantel base
- the addition of 4x4 posts along both sides of the mantel.
- the fir boards added on top
- and the installation of the wood remnant

Before we nailed the 4x4s I gave the plywood base and each of the 4x4s a quick coat of primer paint.

A quick word about the wood we used:
Even though I planned on painting the mantel ---because of the weathered remnant I was building it around, I decided to use basic stock wood for the base, so its rougher look would blend better with the remnant once it was painted.
The 4x4s were run through the planer so they were smoother but still had the 'fence post' texture.
The top of the mantel was the only higher quality piece we used.

Once my Dad helped me with the basic structure and rebuilt and attached the wood remnant, our work together was done.
At this point I was on my own.
After my parents returned home it was time for me to consider the final look of this mantel.
Even though I'd been collecting mantel ideas for this moment (on this Pinterest Board) it wasn't until I saw the wood remnant on front, that I could finally get an idea of the kind of trim that would work.
I started at the bottom because I knew I wanted six inch trim there. So I bought an 8 inch (wide) pine board and ripped it to a full six inch.

Then came my first mistake.

I forgot to double check these first pieces with a level (until after I nailed them) and even though it was barely off center, I could hear my Dad's voice saying, "If you're gonna do, do-it right. You better pull that off."

Ugh.
I learned my lesson. No more forgetting to check my level.

After a few trips to the molding section of Ganahl lumber and Home Depot, and bringing home a few pieces of fancy molding, I realized that what this mantel needed was simplicity.
There was so much going on with the carved sea shells that every elaborate piece of molding I held up to it seemed to clash. I decided to keep it clean and simple looking.


I had to stop and get a picture of my first-ever 45-angle cut on my miter saw!

All done and ready to paint...woo hoo!!!
I was a bit nervous about how the old wood would 'take' the paint. And truthfully, it was also hard to say goodbye to the weathered finish that I love so much-- in another house I would happily have an entire mantel of this luscious distressed wood.
It just wouldn't work in this home, on this wall.

Gulp.
Good bye old wood, hello painted wood... I'm not sure I like you.

Ok. It took a few coats to penetrate the cracks.

Then more caulking and sanding between coats.
However once it was painted I wasn't completely happy.
After a lot of staring I realized what it was.
I just didn't like the amount of sheen from the semi-gloss.

So I went back to the BM store and picked up the satin finish in the Aura paint line. In case you're wondering the shade is Simply White.

Call me crazy but I could tell the difference. Much better.
I'm also glad I used the stock wood because when you're next to it, there's a subtle 'imperfect' texture on the wood that's consistent throughout.
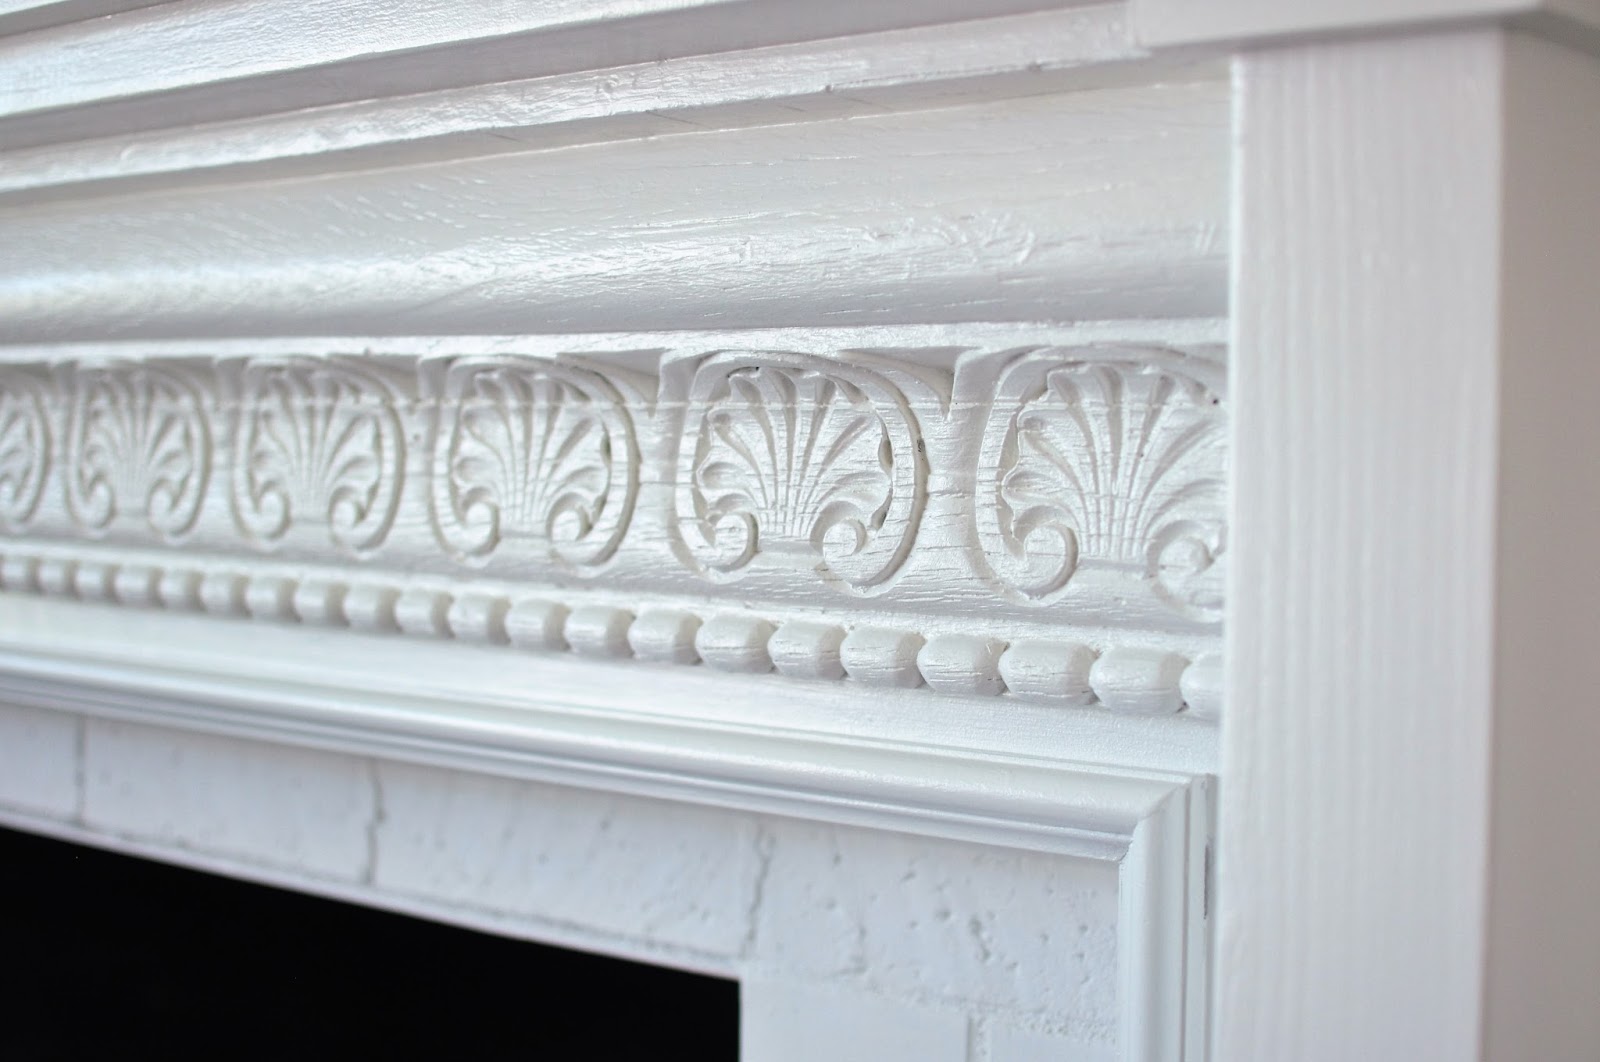
It's a fireplace mantel that could've been here for decades, simply painted a fresh coat of white.

BEFORE

DURING

AFTER
While I was at it, I decided to repaint the brick surround with white chalk paint, (so easy with a foam roller) although I still need to get around to painting the rest of the bricks inside the fireplace black.

Hooray....all done!!
In the meantime, my vertical plank project in our downstairs bedroom-soon-to-be-family-room is moving along.
I'll share more on this project soon.


In the meantime... I thank you from the bottom of my heart for stopping by.
xo
Leslie
I'm sharing this post with these friends:
The Scoop
Inspire Me Tuesday
Wow Us Wednesdays
27 comments:
Beautiful, Leslie!! You did a wonderful job on the mantel and the whole space! Looking forward to seeing the vertical project, too!
I love it Leslie! You are so talented!! Miss you
That wall has gone thru such an amazing transformation, it's beautiful. I love seeing how you and your dad worked on it together. Great Job!!
I can't tell you how much I love all of your hard work - it looks amazing!! The moldings are so pretty and adore how you made the doors or your tv...brilliant! Happy Wednesday ~
This is beyond unreal. I love it. This will be my feature next week on Inspire Me Tuesday.
It is gorgeous! So in keeping with the feel of your lovely home. Great job!!!
Leslie,
This is stunning! You're right, the fireplace now looks like it was built back in the day in this charming beach cottage and the new owners just gave it a fresh coat of paint. I love the overall style and character of the rooms with all of the changes you've made. It's nice to know that if you decide you need a career path, you can become a carpenter...I'd hire you!
xo,
Karen
The after photo is just wonderful! You did a beautiful job. I'm sitting here smiling and I'm very proud of you and all that you do.
FlowerLady
You are amazing and your fireplace is awesome. I can't wait for your dad to see it and hear what he has to say.
it's so beautiful and unique and worthy of press everywhere! great job, leslie, and seeing all the steps leading to the lovely definitely put things in perspective and help everyone appreciate the labor and thought involved with these handcrafted projects. please come paint the bricks inside my fireplace black as well cuz we still haven't gotten around to it even though i bought the paint right away! peace to you, lovely carpenter.
Oh my goodness I cannot believe this.It is absoutely perfect. I have to say I agree with losing the semi gloss. I can't imagaine a prettier mantle than this. You ar positively amazing my friend!
You are a genius! It is a beautiful job. I love the BM stain finish on woodwork.
Brilliantly done Leslie! I particularly love the shutters to block the TV out of view. I hate seeing that black screen in rooms, so this is such a great idea. Well done talented girl!
You Rock Girl. :-)
Love it.
Oh wow this is looking fantastic! Love the molding with the doors. White brick is always pretty.
I am so impressed with you! Your mantel looks like it's always been there. You are a DIY goddess.
That looks amazing! Love the white walls & the mantle. So crisp & fresh.
I love love love this!! We just bought a house and after 17 years I'm changing my decor to cozy cottage shabby chic. And we have two fireplaces I am going to redo like this. Thank you!! One question: where did you find your beautiful wood remnant?
Love your makeover! It looks wonderful. We are going to be ripping ours out and redoing it after we move in. Too costly to have it done the way we want it by the builder.
Seriously, amazing!!
Hi Leslie,
I'm always so late in reading these, I'm so sorry to be so late with my comments. Like everyone else here, I think it is beautiful. It's like you had a zillion designs to pick from, and somehow, you've picked the perfect one for the room and the feeling of the space.
I'm curious, and perhaps not something you would want to comment on in your blog, but what is it like to live in a house, exist in a marriage where you can do this? I can't imagine. I can no longer imagine, so I'm living through others. xx Nancy
B R A V O!!!!!!!!!!
Wow! Great job! Your mantle is beautiful ♥
summerdaisycottage.blogspot.com
WOW! WOW! WOW! As I have commented here before your talents know no bounds! I am so excited for your accomplishment. How wonderful to be able to not only design your projects but to hand-craft them is such a talent. I have tried my hand at many things but working with wood is not one of them. I cannot wait to see more of the planked family room. I personally think that you need to contact Eddie Ross at Better Homes and Gardens and have him come and do a photos shoot of your beautiful "new" house. Keep up the beautiful work Leslie!
Leslie, this is absolutely stunning! You must be in there staring at it all day! You really did an amazing job!
Shelley
You never did share a post on your bedroom planking DIY. Since I'm about to embark on this project, I hope you will consider revisiting the topic. You are so handy!
Hi Beth, I did write this one post here explaining what i learned from my first plank job: http://gwenmossblog.blogspot.com/2016/04/plank-walls-and-painting-is-done-master.html
But I also put a link to a really helpful video by Jenna Sue Design Blog who has a wonderful video tutorial of what i basically learned the hard way hahaha (wished i would have seen it beforehand). Here's the link for that: http://blog.jennasuedesign.com/2016/03/diy-shiplap-tutorial-video-the-easy-and-inexpensive-way/
I sure hope this helps with your own project, please let me know how it goes!
ox
Leslie
Post a Comment